Using the Graphics Viewer IrfanView
Using the Graphics Viewer IrfanView |
|
Overview:
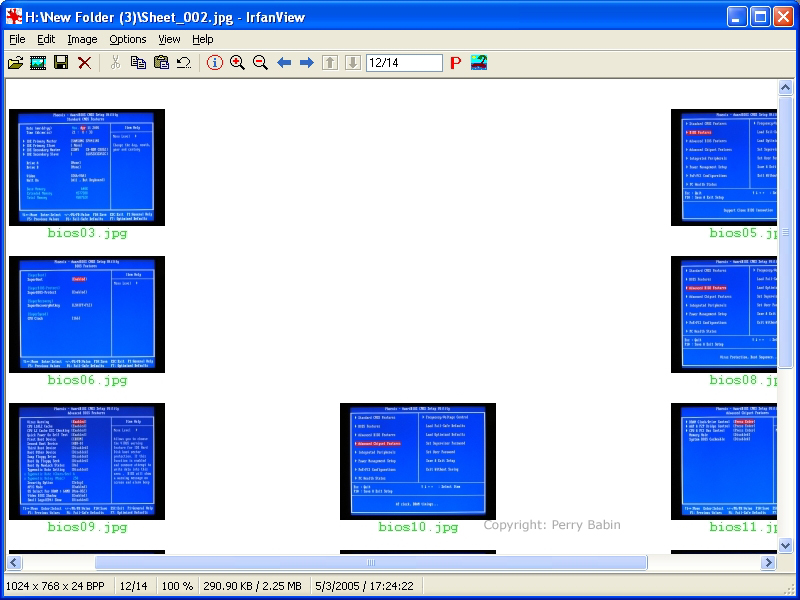
This first image is the IrfanView desktop. As you can see, it uses a standard Windows layout. The buttons on the toolbar are as follows:
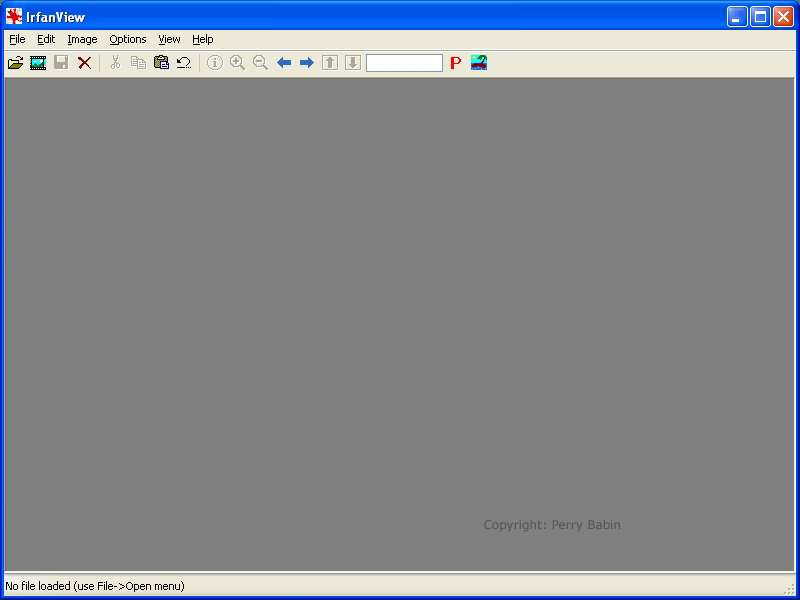 Open:
 Slideshow:
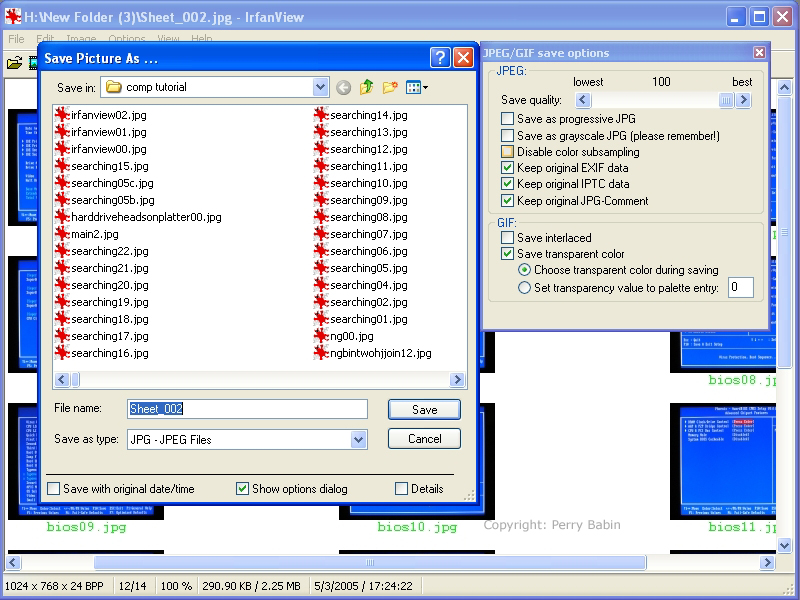
 Save/Save As:
 Delete:
Cut:
 Here, the 'background color for cut' was set to white. As you can see, instead of randomly selecting an area, I selected two of the thumbnails and their associated text. Since the background of the image and the 'background color for cut' were set to the same color, you can not tell where they were cut from (the area from which they were cut was replaced with the 'background color for cut' which was set to white). To set the 'background color for cut' option, go to >> OPTIONS >> PROPERTIES and select the MISC. 3 tab.
 Copy: Paste:
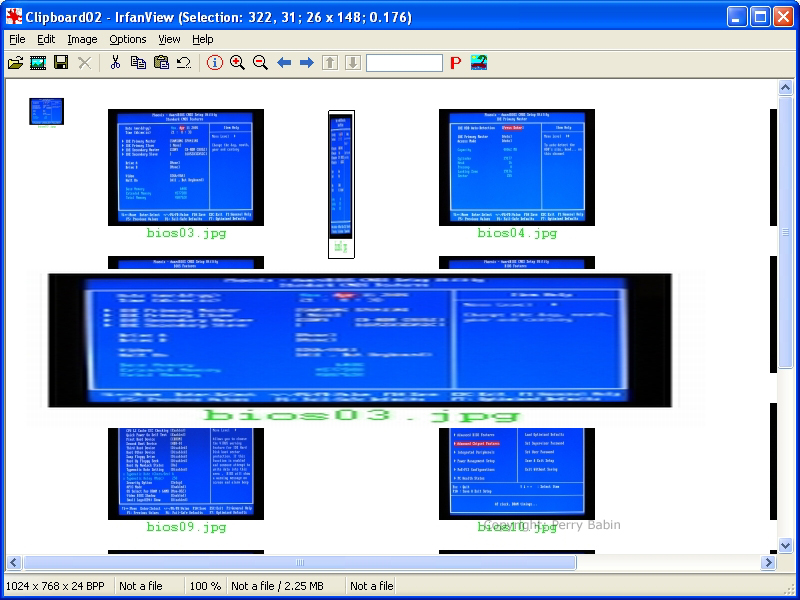 Above, notice that the pasted image that's larger than the original image is blurred (lacks definition). This is because there's a limited amount of data with which to work. To fill the larger area, the software has to generate additional image data based on the available image data. This is common in bitmap editing and is not the fault of the software. Undo: Information:
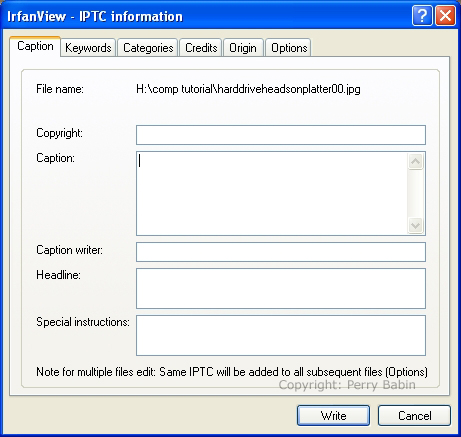
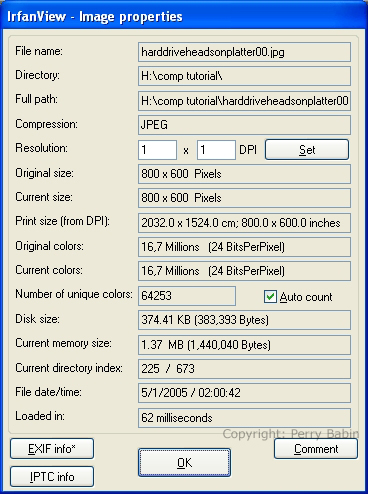 The EXIF data is generated by the camera when the picture is taken.
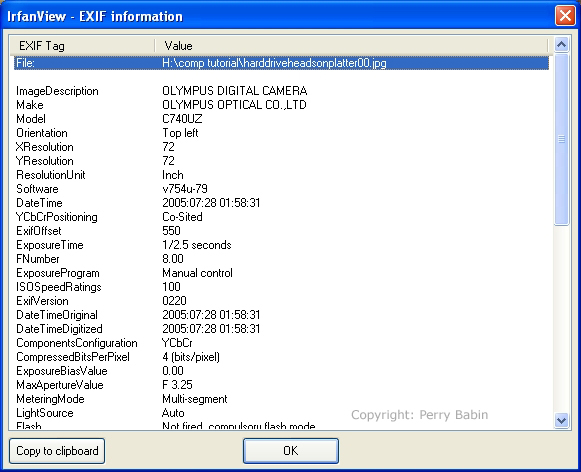 The ITPC information is editable by anyone who views the file with software that offers access to the information. You can see a few of the available fields below.
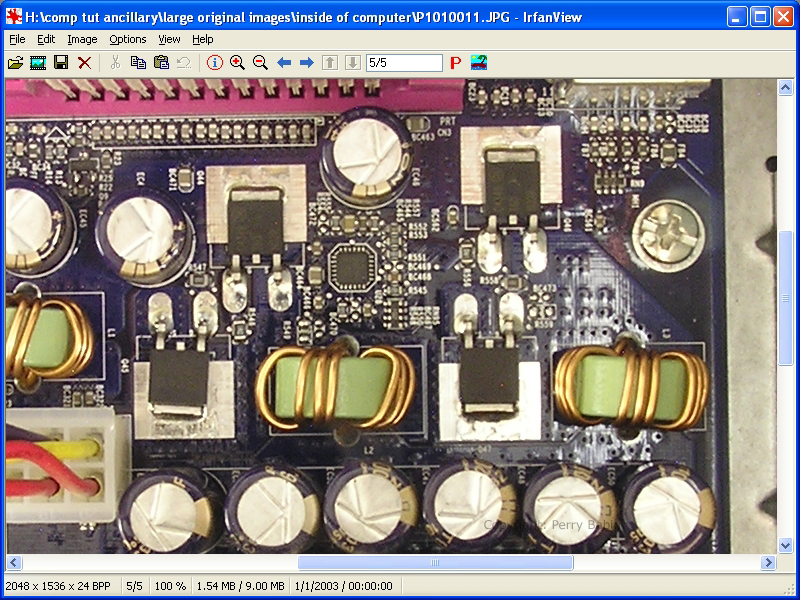
 Plus/Minus:
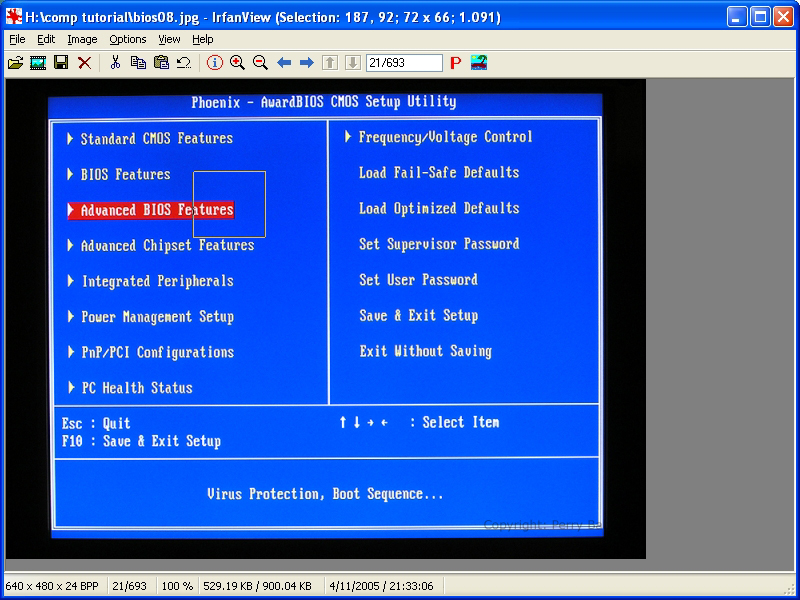
 Below, I clicked the '+' button until the image was displayed at 100%. When the image display size is larger than the window, you can see only a portion of the image. To get to the part of the image in which I was interested, I used the RIGHT mouse button to drag the image (when zoomed, the default view was the upper left corner of the image). Another way to zoom-in is to select an area then click inside the selected area.
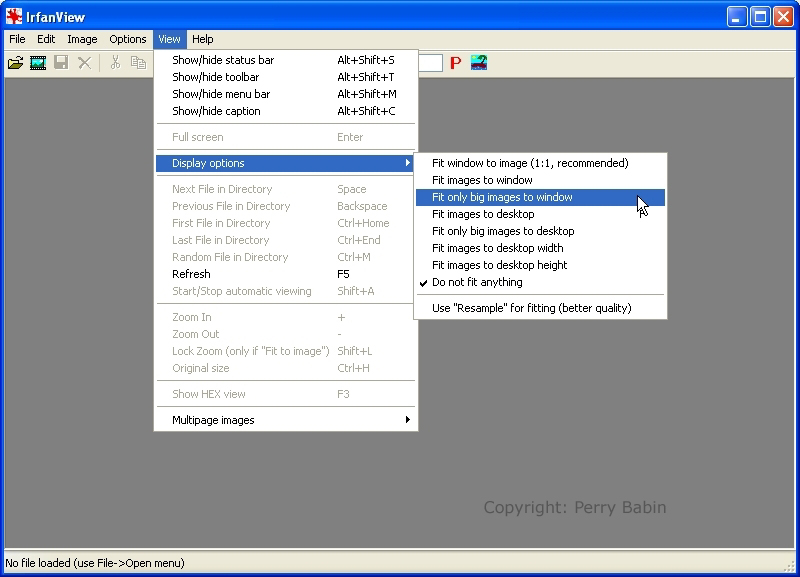
 Note: There are several default settings for the way IrfanView displays an image. They can be accessed by going to VIEW >> DISPLAY OPTIONS. The following image shows the options.
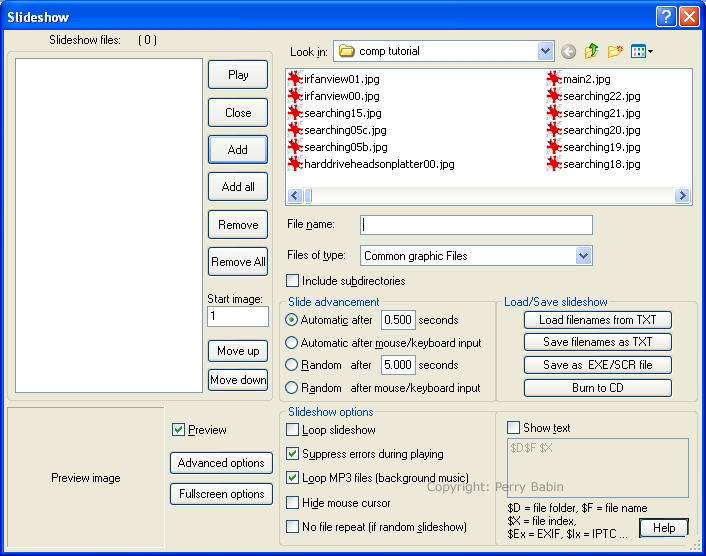
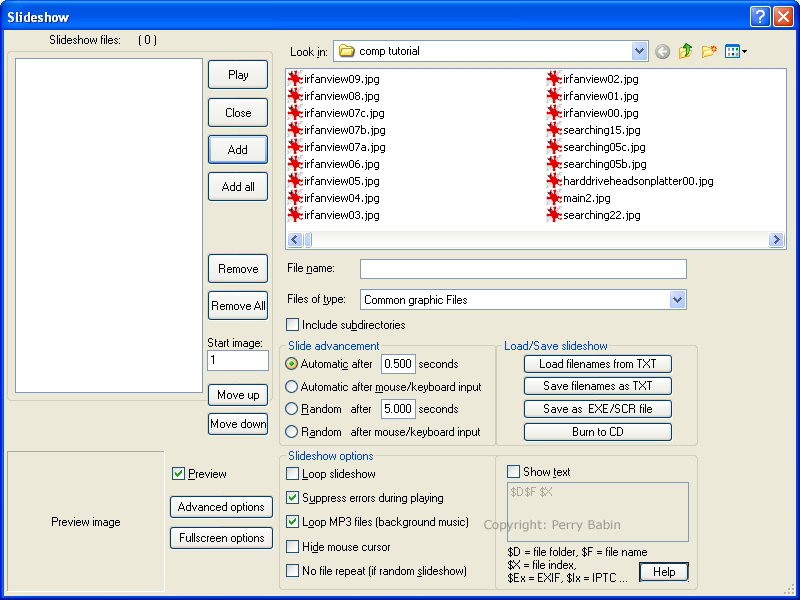
 Left-Right arrows: Overview:
You can add files in several ways:
You can sort the files manually or by clicking the ADVANCED OPTIONS button and selecting one of the choices in the dialog box.
 The slides can be advanced in several different ways:
Since audio files are included in the supported file types, you can select an entire directory of files and have them play in any order you select (even randomly). It also works with video files. You may need to download the 'plugins' from the IrfanView site to play audio and video files.
 Building Screensavers: Notes:
Saving the File List:
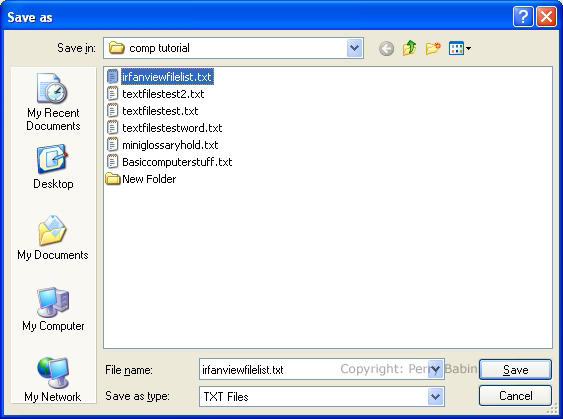 Note: I have found no way to print a list of files from Windows Explorer (except for this feature in IrfanView). To generate the file below, I set the slideshow file browser to show 'all files' and then clicked ADD ALL. Then I saved the file list to a text file. If someone knows a different way to generate a file list in text form, please email me.

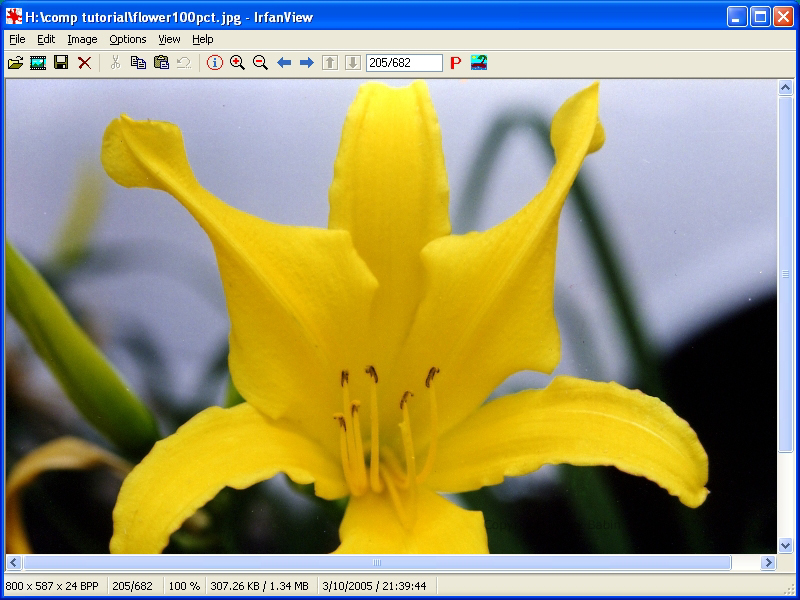
Resizing an Image: While IrfanView isn't a full featured image 'editor' (I don't think it was ever supposed to be a full featured editor), it can handle a few tasks. The following is an image that needs to be reduced in size. It's 800 pixels wide here. I want it to be 640 pixels wide. To resize it, I'll go to IMAGE >> RESIZE/RESAMPLE.
 In the dialog box, I can either enter the width I want on the left or I can pick a standardized size from the right size. I chose the 640x480 radio button and clicked OK.
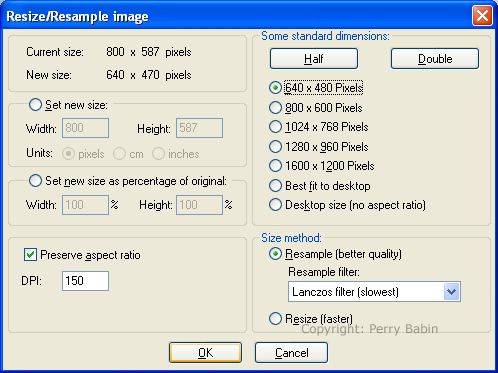 This is the result. You'll notice that the resized image is not exactly 640x480. That's because the choice to preserve the same 'aspect ratio' was checked. Since the height/width ratio of the original image (800/587 or 1.362/1) was not the same as the chosen new size (640/480 or 1.333/1), the software could not resize to exactly the chosen size. If 'preserve aspect ratio' was de-selected, the new image would have been resized to precisely the chosen size.
 |
||||||||||||||||||||
|
||||||||||||||||||||
|
Red-Eye Removal:
 Screen Capture:
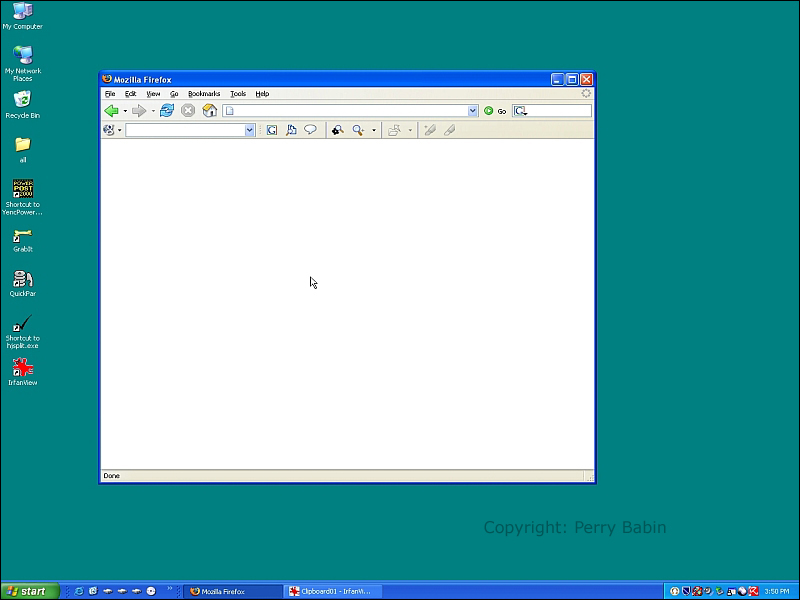
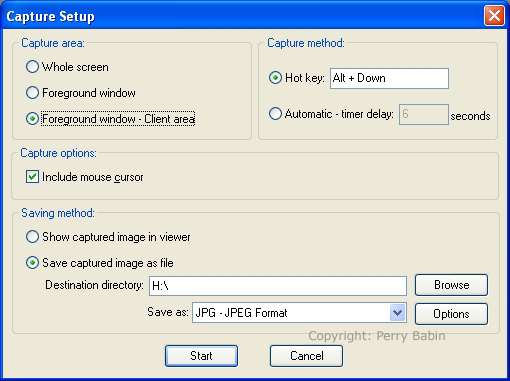 Above, you can see that you have a choice of different trigger modes (on the right of the dialog box). The captures can be triggered manually by a set of keystrokes or at selected time intervals. If you want the screen to be captured by a keyboard shortcut, you can set the shortcut key by clicking inside the text field next to 'Hot Key' and pressing the desired key. When you press alt and the selected key, an image will be captured. The captured image can be dropped in any folder (the default folder is set on the lower part of the dialog box) or the captured image can be set to open automatically in IrfanView for editing. At the left of the dialog box shown above, you can see that you have 3 choices for the capture area. It can capture everything that's displayed on the monitor (shown below).
 It can capture the full frame of the active (foremost) window.
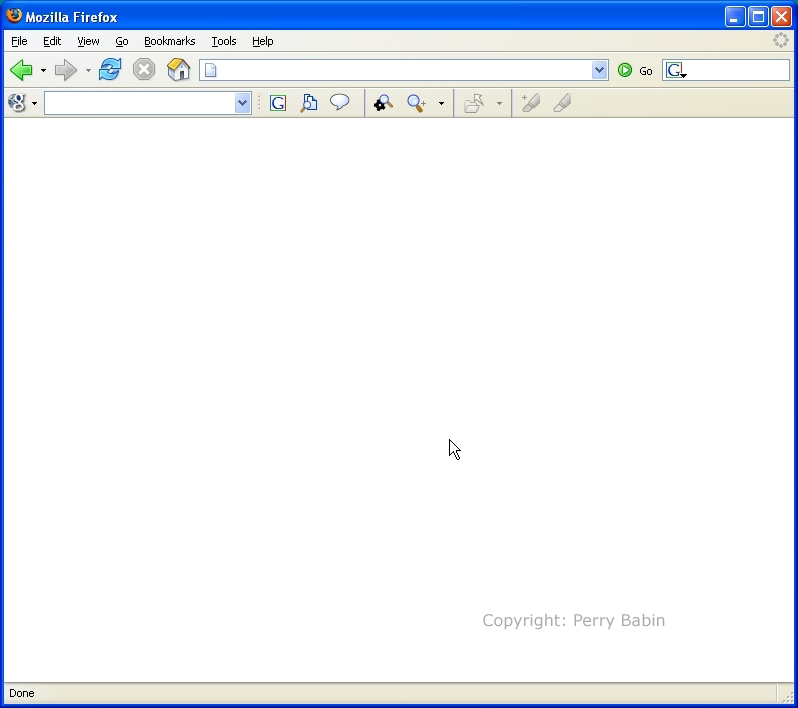 Or it can capture the 'client area' of the foremost window (shown below).
 When capturing by time interval, it will capture frames until you reopen the capture dialog box (simply press the 'c' key when IrfanView is the foremost window) or until you close IrfanView. In the next image, you can see that I set the capture timer to 1 second. The files from the highlighted file down were created by IrfanView at 1 second intervals. Notice that they were dropped in the 'destination directory' (drive 'H' in this case) selected in the capture dialog box.
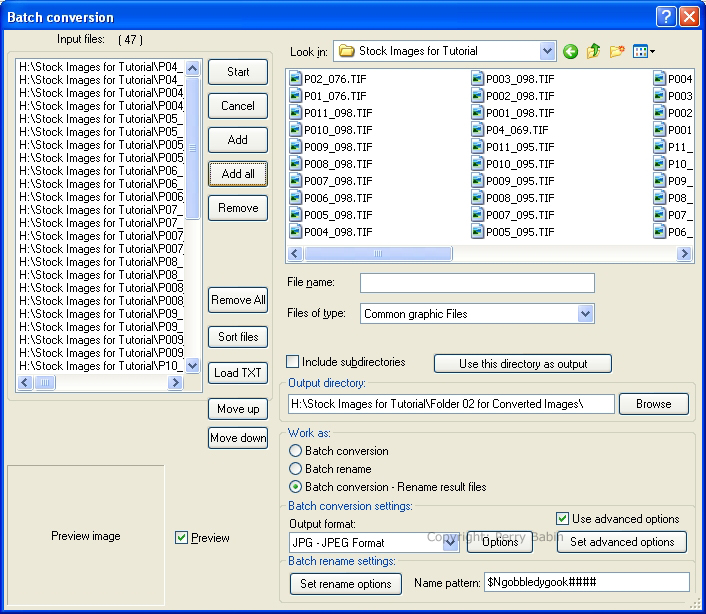
 Batch Conversion/Rename: Here, we see the batch dialog box. All of the files have been added already. I've also set the output folder to a new one I created just for this example. You can drop them into the same folder if you like but this makes things a little neater.
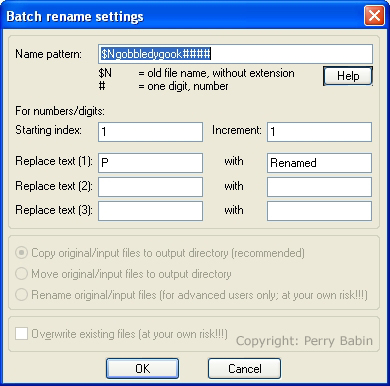
 When I clicked on the 'Set Rename Options' button above, the following dialog box popped up. Here, we control what the new name will look like. Here's a list of options:
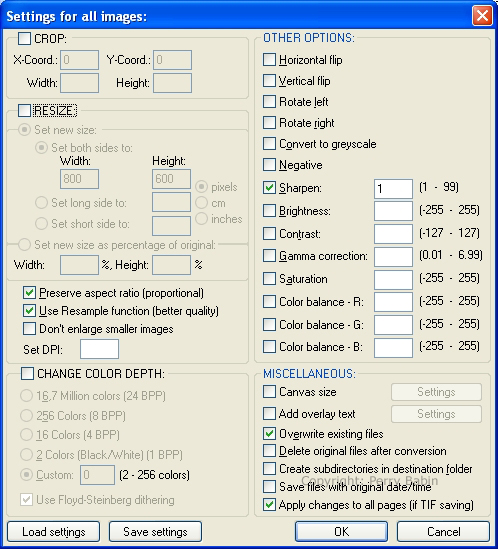
 The dialog box has several options on the way the actual image is processed. For example, you can resize all of the images. Although it's perfectly fine to reduce an image's size, increasing the size is rarely done because the quality suffers. you can apply effects (sharpen, brightness, gamma...). There's a long list down the right side of the dialog box. Most all of the options are self explanatory. If you look near the bottom of the right side of the dialog box, you will see an option for text overlay. When this box is checked, the grayed out button will become active.
 Above, I chose to add the text overlay. Below, you can see the dialog box. Here, you can add text to the images. For our sample, we added a short message indicating that there was no copyright and we included the file name. Please note that the original file name and extension will be shown. If you want the new file name and extension to be shown, you'd have to add the overlay AFTER renaming the files. The height and width dimensions are for the text box on the image (the text box borders are not visible). On our images, I wanted the text to be centered so I set the text box to the same width as the image and checked the radio button labeled 'center'. The text is going to be centered in the text box, not necessarily on the image. The X/Y values are for the top, left corner of the text box. Setting these will force the text box away from the top left of the image. Here, I left the X (left/right) value at zero. I set the Y (up/down) value to 1/2 of the image height. This means that the top of the text will fall below the centerline of the image. If you want the text to have no background (other than the image), select 'transparent text'. If you want it to have a background, you can select the color below. Keep in mind that the background will fall only directly behind the individual letters (the entire text box will not have a background).
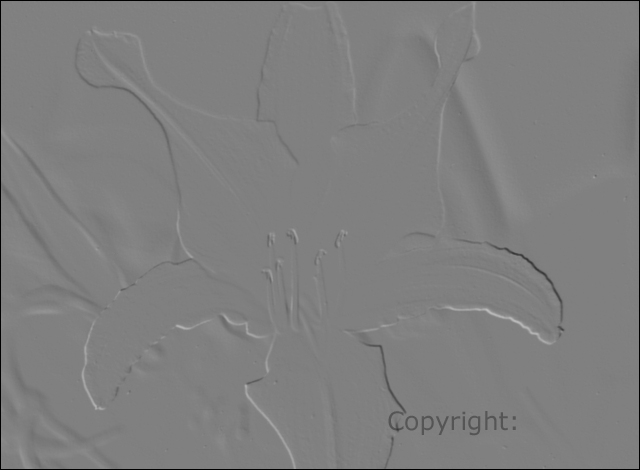
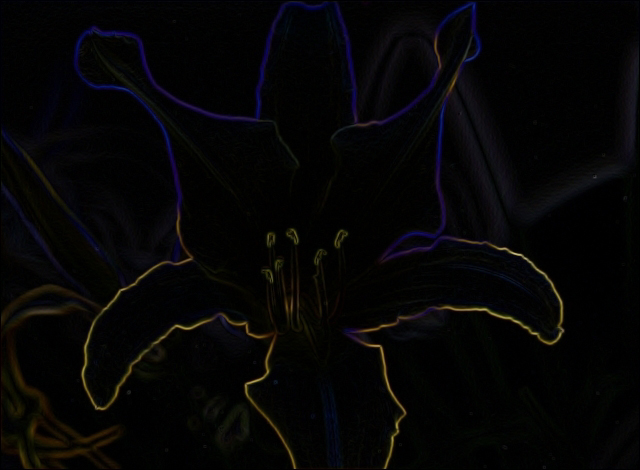
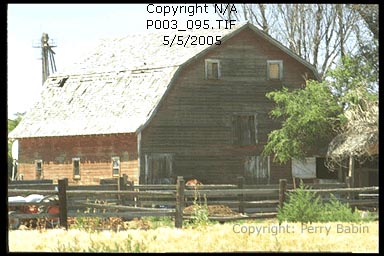
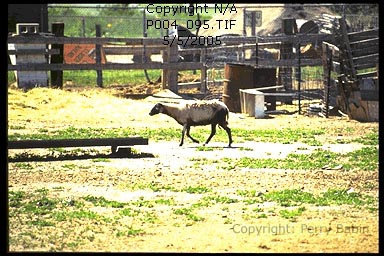
 The following image is a before/after example of what the text looks like.
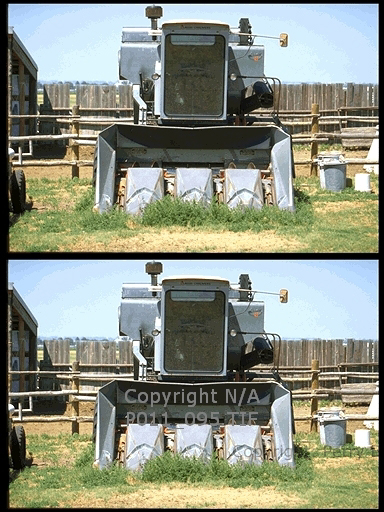 This is a side_by_side comparison of the new files and the old files.
 Creating Thumbnails:
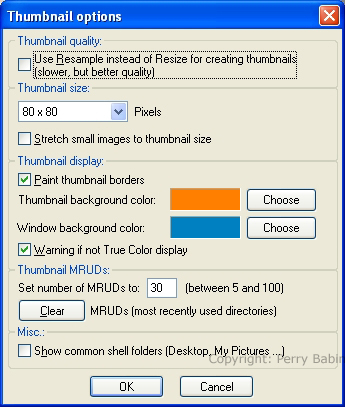
 This is the dialog box for the thumbnail options. It can be accesed by going to OPTIONS >> SET THUMBNAIL OPTIONS. A couple of notes:
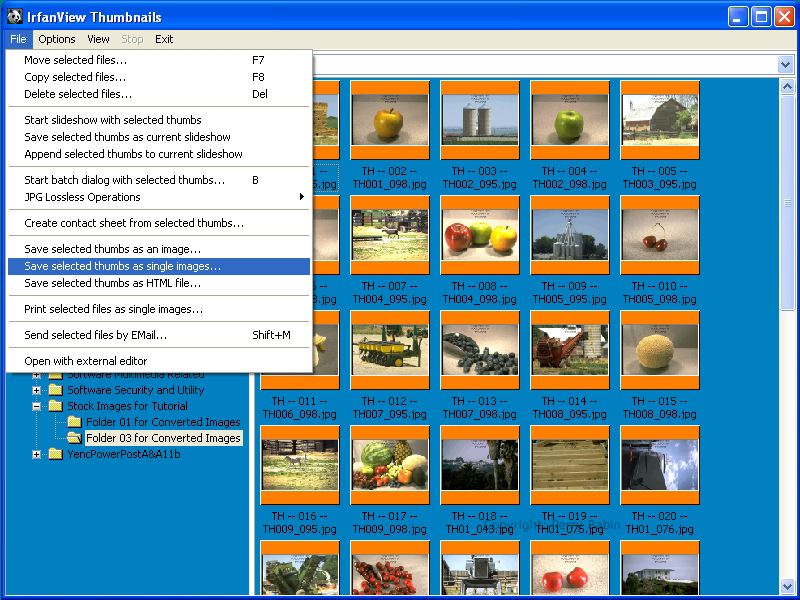
 To generate the thumbnail files, go to FILE and select the appropriate output. The one I chose (to generate individual thumbnails) is highlighted. The thumbnail will have the same name exept that '_t' will be appended to the file name (before the extension).
 |
||||||||||||||||||||
|
|
||||||||||||||||||||
|
Contact Sheets:

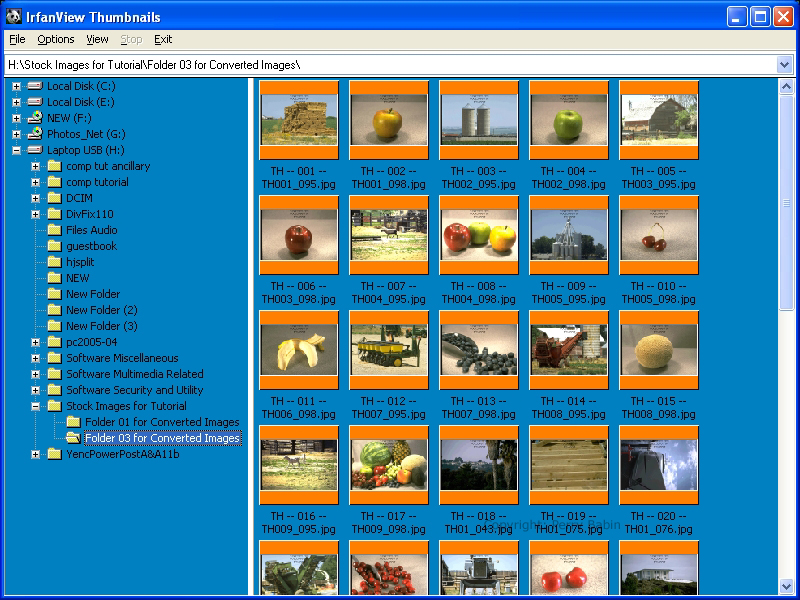
 Note: For this example, I went through and batch renamed the files (I had deleted the files from the previous example). This time, I inserted the incremental number near the beginning of the file name. If you are going to insert this number near the beginning of the file name (so that the number has a significant effect on the order of the files when sorted), you should include at least as many #s as you have digits in the file count. Failure to do so may lead to files being sorted in a somewhat different order (depending on the sorting system).
Although the fine details will vary from one scanner to another, the basic steps will be the same. To scan an image (assuming that you have a scanner installed on your computer), you go to FILE >> ACQUIRE. You will see something similar to this first image (your software will be different).
 Click PREVIEW to make a preliminary scan of whatever's on the scanner table. If you have the option to select the scanning resolution. Some software is dumbed down so you may have to work a little to access the advanced options.
 When the image appears, select the desired area (if it hasn't be automatically selected) and click SCAN. When the scan is done, the image will open in IrfanView to be edited and/or resized and then saved.

The following images in this section are of the print dialog box. Irfanview offers more print options than any other software I've ever used. It's very easy to get the printed page to look precisely as you'd like. For instance, I've used it quite a few times to print scanned pages. To get a good quality scan of a text page, you have to scan it at relatively high resolution (~600dpi). If you scan at that high of resolution, many software packages will print it on multiple pages instead of a single page. in IrfanView, you can easily print it to perfectly fit the page. With this setting (note the 'print size' options), the file will be printed to the actual 'width'. If, for example, you print a page that would be a full normal (8.5x11in) page, in 'landscape', the page will be the correct width but it will be squished from top to bottom.
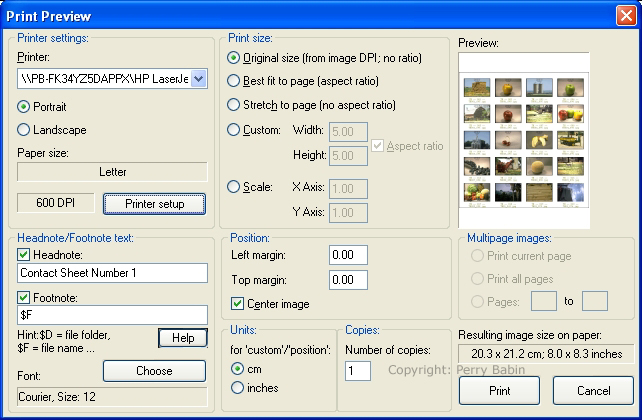 Here, the file will be printed as large as possible within the margins of the page and the aspect ratio will remain in-tact.
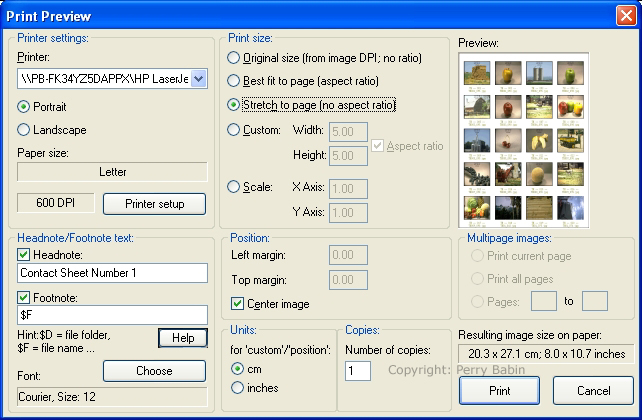
 In this first image, the image is going to fit to the margins of the page with no regard to the original aspect ratio. This will provide the largest possible printing of the file. It may also result in geometric distortion (squares may become rectangles, circles may become ovals).
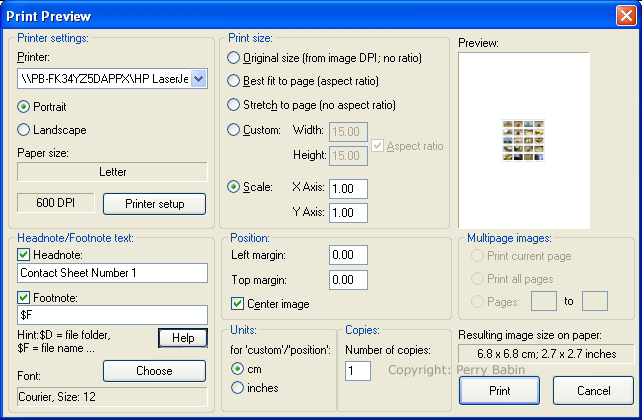
 Here, the image will be a specific size. Note that the units (centimeters/inches) are used in this setting.
 Below, you can set the ratio of the image's actual dimensions to the printed dimensions. Generally, printing is done at 300DPI (even if your printer's resolution is specified to be 1400DPI). This means that an image that is 600 pixels wide will be 2 inches wide on the printed page when you have the scale set to '1'. If you set the scale to '2', the 600DPI image will be 4 inches wide.
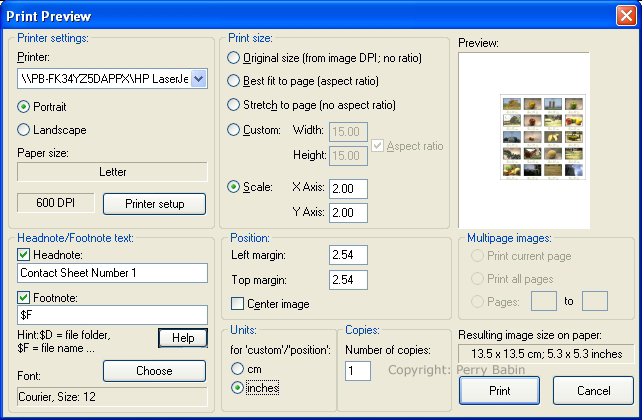
 You can see that the preview of the image below is double that of the previewed image above. Also notice that the scale is set to '2'.
 In the previous printing examples, all of the images were set to print in the center of the page. Below, you can see that the 'center' box is no longer checked and the image is offset by 2.54cm from the top/left corner.
 In thie example below, the image is offset by 2.54 inches. All that was changed is the measurement units. Keep in mind that the image can not be pushed off of the page if the offset is set too high but the image will be squished out of proportion.
Notes:
|
||||||||||||||||||||
| Contact Me: babin_perry@yahoo.com | ||||||||||||||||||||
|
Perry Babin 2005 - Present All Rights Reserved
|
||||||||||||||||||||